Categories > Guides and Tips
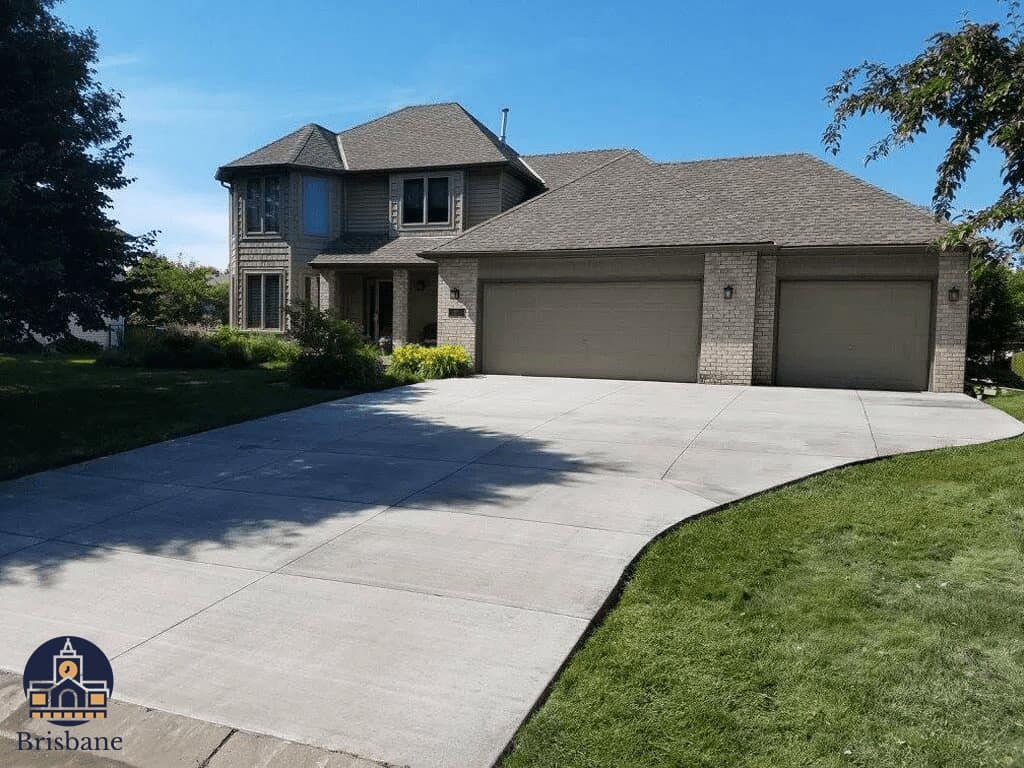
Cost of Building a Concrete Driveway in Brisbane
- How Much It Will Cost to Build a Driveway in Brisbane
- Average Cost of the Different Types of Concrete Material
- Colored Concrete
- Exposed Aggregate
- Stenciled Concrete
- Stamped Concrete
- Factors That Affect the Cost of the Driveway
- Land Contour
- Accessibility
- Preparation
- Type of Concrete to be Used
- Steps on How to Build a Concrete Driveway
- Make a Driveway Plan
- Calculate the Amount of Concrete Needed
- Estimate Materials to Build Forms
- Determine the Overall Cost
- Get the Necessary Permit
- Prepare the Base of the Concrete
- Mark the Outline of the Driveway
- Install the Forms
- Backfill the Area with a Roadbase (Optional)
- Add Fill Material to Thicken the Base
- Compact the Soil and Fill Material
- Put the Reinforcement Steel in Place
- Pour the Concrete
- Flatten the Surface
- Insert the Contraction Joints
- Add Texture to the Concrete’s Surface
- Let the Concrete Cure
- Remove the Framing and Inspect the Driveway
- Advantages of Using Concrete Material for Your Driveway
- Cost-Efficient
- Durability
- Less Maintenance
- Easier to Remove Snow
- Design Versatility
- Top Concrete Services in Brisbane
- Driveway Solutions
- Grant Galloway Concreting
- Creative Concrete Constructions
- WR Concreting
- MPA Concrete Solutions
Concrete is considered one of the most popular materials for driveways. It is durable, has low maintenance, and easy to install.
If you’re planning to build one, keep reading to learn more about the cost of constructing a concrete driveway in Brisbane.
How Much It Will Cost to Build a Driveway in Brisbane
Generally, it costs approximately $65 per square meter to build a concrete driveway in Brisbane. If you are planning to build a 30-square-meter concrete driveway for your home, expect to pay between $1,500 and $3,000.
However, there are various factors that can affect the cost. One of these is a sloping surface which can add $10 more per square meter than a flat surface. For colored concrete, the cost ranges from $75 to $95 per square meter.
Average Cost of the Different Types of Concrete Material
Aside from plain concrete, there are a number of concrete material options available. These decorative types of concrete materials may provide a more eye-catching result for your driveway, but it also comes with a higher price.
Below is a table of the different types of concrete material for a driveway and their corresponding average cost per square meter in Brisbane.
| Type of Concrete | Average Cost per Square Meter |
| Plain concrete | $65 |
| Colored concrete | $75 to $95 |
| Exposed aggregate | $100 to $150 |
| Stencilled concrete | $100 to $150 |
| Stamped concrete | $100 to $150 |
Let’s find out a little bit more about the different kinds of concrete:
1. Colored Concrete

In colored concrete, the color is added into the concrete while mixing. If you’re creating a new concrete driveway or resurfacing an existing driveway, this is a good option as you can use colors that match with your home or other elements around your home.
Almost any color you prefer can be achieved using a number of chemical mixtures or concrete dyes. Instead of just plain grey concrete, adding color to driveways can bring life and vibrance so that they harmoniously match any home.
2. Exposed Aggregate

Exposed aggregate, also known as pebblecrete, has been one of the most popular driveway surface options since the 1960s. It comes in a range of colors and creates a surface that gives a vehicle good traction on the driveway.
After the concrete slab is poured, exposed aggregate is added. After the concrete has been cleaned and repaired, it can also be put over the previous concrete. If oil or grease gets on its surface, it can be cleaned without affecting its appearance.
3. Stenciled Concrete

With stenciled concrete, you are applying a pattern to driveway concrete. These stencils are also available in multiple colors.
A stencil is applied on already-existing concrete and usually, over a base coat. Then, there’s a topping in a different color which is sprayed or troweled over the stencil. As a result, you have a modern-looking design and durable surface.
4. Stamped Concrete

With concrete stamping, you are giving your driveway a texture. There are many textures to choose from. For instance, you can stamp grout lines between pavers or brick, or you can make a concrete driveway look like a paved driveway.
Factors That Affect the Cost of the Driveway
When you plan to build a driveway for your property, be sure to research all possible factors that can have an impact on the costs you might incur. This will help you minimize the costs and stay on your budget without compromising the resulting quality.
Below are some of the top factors that you have to consider when building a driveway for your property.
1. Land Contour

If you have a sloping driveway, building or repairing it will cost you more. In Brisbane, you may have to spend around $10 more per square meter if the driveway slopes.
2. Accessibility

There are some areas where it’s difficult to get access to or far from where concreters are located. With these, expect that they might charge you more.
3. Preparation

Depending on your property, there may be excavations or other preparations needed beforehand before building a driveway can begin. For instance, if there’s a driveway that already exists, it will need to be removed first.
4. Type of Concrete to be Used

Various decorative options are now available in the market such as coloured concrete, exposed aggregate and stenciled or stamped concrete. However, these will cost you more than a plain concrete driveway.
Steps on How to Build a Concrete Driveway
Building a concrete driveway may require a lot of hard work and careful planning. But if done properly, you’ll have an aesthetically-pleasing and long-lasting driveway.
If you’re planning to do things yourself, we’ve put the following steps on how to build a concrete driveway.
1. Make a Driveway Plan

In your planning stage, you must consider the driveway’s size, shape, and route. Draw an outline of your driveway and look at the space’s overall length and width. Also, think about where you’ll park your cars, and whether you’ll need room to turn around.
Keep in mind that the cost increases as you add to the length of the width of the driveway. The sketch will help you estimate how much material you need to buy.
In general, the following is the recommended minimum width for the different types of vehicles.
| Vehicle Type | Driveway’s Minimum Width |
| Car | 18 feet (5.5m) to 20 feet (6.1m) |
| Vans or trucks | 22 feet (6.7m) to 24 feet (7.3m) |
| Single vehicle | 10 feet (3.0m) to 12 feet (3.7m) |
2. Calculate the Amount of Concrete Needed

After you have decided on the dimensions of your driveway, next is to calculate the amount of concrete needed. You can follow the steps below to calculate how much concrete you’ll need for your driveway.
- Decide on the thickness of the concrete with feet as the unit of measurement.
- Measure the length and width in feet.
- Calculate the area by multiplying the length and the width.
- Calculate the cubic feet by multiplying the thickness in feet by the square footage.
- Multiply the cubic feet by 0.037 in order to convert it to cubic yards. Take note that the concrete is being sold in cubic yards.
Example of calculation for a 10 feet by 12 feet concrete driveway with a thickness of 4 inches:
10 x 12 = 120 square feet
4 ÷ 12 = 0.33
100 x 0.33 = 40 cubic feet
40 x 0.037 = 1.48 cubic yards

3. Estimate Materials to Build Forms

You will need wood to build your forms and secure the concrete while it’s being poured. All of these should be included in your budget calculation.
A pine board that is 1 inch (2.5 cm) by 4 inches (10 cm) long and several 4 inches (10 cm) stakes are usually used to lay a driveway. As you pour the concrete, your pine board must be long enough to completely enclose the driveway.
4. Determine the Overall Cost

After calculating how much concrete and other materials are needed, estimate the total cost. The cost of any equipment you plan to rent for grading or finishing, and the cost of labor, if you decide to hire workers for some assistance must also be taken into account.
Other materials must also be included such as base gravel, fabric underlayment, delivery fees, sleeving materials, rebar or mesh wire, and any equipment costs. Moreover, take into account any cost when getting a permit.
5. Get the Necessary Permit

In Brisbane, a permit is required before you can build, repair, or modify a driveway. The Brisbane City Council will assess your proposal in light of the pertinent requirements and guidelines before issuing a permit.
Here are the following requirements for your driveway that you must adhere to, whether it’s for residential or commercial purposes.
- It should be made of a solid and non-slip material such as concrete, pavers, or asphalt. Materials like tiles, gravel, and bluestone are prohibited.
- It should have the same height as the footpath.
- Within the allowable gradients.
- Doesn’t have stormwater pits.
- Free from street trees.
- Constructed in compliance with the technical standards of the City Council.
6. Prepare the Base of the Concrete

To support the weight of the concrete, make sure that you have a solid and firm base. You can add clay to tighten up loose soil. To level out too-loamy soil, add some sand or gravel.
The soil should be compacted to make it even, whether or not you add material. You can use crushed rock or gravel to build a base and fill soft areas with extra material. When compacting the soil, you can use rammers and vibratory plate compactors.
7. Mark the Outline of the Driveway

To outline your driveway, you must use stakes. Simply hammer the small wooden or metal stakes at the top of the driveway and where it will exit the street. You can then tie a builder’s line to complete the outline.
Place the stakes every 3 feet (0.91 m) to ensure that the form will hold. Check if the stakes are placed according to the layout of the driveway. Also, ensure that the length and width are accurate based on the design plan.
8. Install the Forms

With the stakes already put in place, anchor the forms on it. The usual forms used are nominal lumbers with a dimension of 1 inch (2.5 cm) by 4 inches (10 cm).
For curved lines, you can use a Masonite or plywood that is strong enough to hold the concrete load yet flexible enough to bend. Your forms will be easier to put together and disassemble if you use screws and a power drill.
9. Backfill the Area with a Roadbase (Optional)

If your driveway needs further base stability, excavate the soil and then backfill it with a roadbase before pouring the concrete. Roadbase is a mixture of crushed granite and gravel. When compacted, the layer should be around five inches thick.
10. Add Fill Material to Thicken the Base

Add gravel or crushed rock to areas that aren’t as high as the rest in order to level out the base. Use a straightedge or tie a string across the top of your forms, then measure down to the soil to determine the exact depth.
11. Compact the Soil and Fill Material

It’s important to compact the soil and fill material since they;ll hold the weight of the concrete and a load of vehicles. For this task, you can buy or rent compacting equipment.
To make this process more effective, try to add a little water as you compact the material. On looser soil, you might need to add more fill material to keep it level.
12. Put the Reinforcement Steel in Place

The strength of your driveway will be greatly improved by adding steel reinforcement. It’s highly recommended as it ensures the structural integrity of your concrete, and helps support and distribute the weight of your vehicle.
Some of the common materials used as reinforcement steel which are available at building supply stores are the following:
- Number 4 rebar on 12-inch (30.5cm) centers
- 6×6 welded wire reinforcing wire fabric
13. Pour the Concrete

With the sub-base and perimeter all set up, the concrete can now be poured. A hoe can be used to disperse the concrete as it is being poured to keep it relatively flat. Check the thickness of the concrete based on the top level of your form which is 4 inches.
A wheelbarrow should be adequate for smaller driveways. However, you can also rent a piece of machinery with a front bucket, such as a skid steer, tractor, or mechanical-engine powered wheelbarrow for bigger driveways to make your job easier.
14. Flatten the Surface

Evenly flatten the concrete’s surface by using a hand trowel. Take note that the driveway can be sloped, but it should still be flat. A flat surface will prevent stagnant water on your driveway.
15. Insert the Contraction Joints

Add 1 inch (2.5 cm) deep cracks or cuts to the concrete every 4 feet (1.2 m) by using wood or plastic zip strips. This will prevent cracking as the concrete dries and contracts.
For the best appearance of your driveway, make sure that the contraction joints are spaced apart uniformly. Also, do this while the concrete is sufficiently damp so that you can easily insert the contraction joints.
16. Add Texture to the Concrete’s Surface

Meanwhile, it’s important that the concrete’s surface is not too smooth so that your vehicle tires can get a grip, especially if it’s raining. You can achieve this by dragging a brush or a burlap sack across the surface as it’s in its drying stage.
Take note that this must be done while the concrete is a little bit damp to allow the texture. If there is a slope in your driveway, broom the concrete in that direction.
17. Let the Concrete Cure

The curing of concrete is done by adding a moisture-retentive barrier to its surface to prevent it from drying out too quickly. You can do this by putting a layer of plastic sheeting or by applying a chemical curing compound.
For at least 3 to 7 days, it’s recommended to protect your concrete from extreme weather. Wait for the newly-built driveway to be completely cured before you can park your vehicle on it.
18. Remove the Framing and Inspect the Driveway

After the concrete is completely cured, you can then remove the wooden framing that was intended for the pour. Inspect if there are cracks that may appear. If there are, you are able to repair them first before you can park your vehicle for the first time.
Advantages of Using Concrete Material for Your Driveway
It’s no doubt that concrete is still the top choice material for building a driveway, even though there are several options coming out in the market nowadays. Here are the advantages of using concrete material for building your driveway.
1. Cost-Efficient

One of the most crucial aspects you must take into account when doing a home improvement project such as the driveway is the cost. Using concrete material is the best option if you have a tight budget.
Compared to asphalt or gravel, it could be more expensive. But because it needs less maintenance in the long run, it’s a great option for homeowners.
2. Durability

To build a driveway, you must make sure the material you choose can support the weight of your vehicles. As concrete has excellent structural integrity, it is a great option for bearing the load of numerous vehicles.
It doesn’t easily erode unlike other materials. As we can see, concrete has been widely used in the construction of roads and bridges, therefore this is already a proven durable material.
3. Less Maintenance

Maintaining and cleaning a concrete driveway requires little effort. With some warm water and soap, you can easily get the stains out. For tougher stains and marks, you can occasionally get in touch with a stain removal specialist to help you.
On the other hand, one downside of a concrete driveway is it can crack in a cold climate because of the cycle of freezing and thawing. However, cracks can be avoided by applying high-quality sealants.
4. Easier to Remove Snow

If you reside in a cold climate, you are aware of the time and effort required to clear snow from the driveway. A concrete driveway makes snow removal easier than driveways made of other materials such as gravel and pavers.
5. Design Versatility

Before, driveway beautification options for homeowners typically include the use of pavers or gravel. But due to the versatility of concrete, it’s quickly replacing those options as a preferred choice among homeowners.
Today, you are able to match the color scheme of your house with stained and stamped concrete which are available in a wide range of colors. For a driveway that matches a house made of bricks and stones, you can also opt for concrete brick pavers.
Top Concrete Services in Brisbane
If you want to get the services of a professional, here are the top concrete services in Brisbane that can give your concrete driveway the best results while also saving you time and money. Contact these companies for more info.
1. Driveway Solutions

Driveway Solutions is a family-operated company serving throughout the Brisbane area to meet the concreting demands of their clients. Their skilled team provides the best results for concrete projects of all sizes, including driveways and retaining walls.
| WEBSITE: | https://drivewaysolution.com.au/ |
| ADDRESS: | 53 Friend St, Wakerley QLD 4154, Australia |
| CONTACT INFO: | +61 431 130 005, [email protected] |
| OPERATING HOURS: | Monday – Friday: 8AM-5PM |
2. Grant Galloway Concreting

Grant Galloway Concreting has been in the building and construction industry for more than 30 years. They provide a wide variety of concreting services, such as driveways, slabs, walkways, and patios, among others.
| WEBSITE: | https://grantgallowayconcreting.com.au/ |
| ADDRESS: | Tarragindi, Queensland, Australia |
| CONTACT INFO: | +61 7 3392 7239 |
| OPERATING HOURS: | Monday – Friday: 6AM-5PM |
3. Creative Concrete Constructions

Creative Concrete Constructions is a Brisbane-based company with over 20 years of experience in the concreting industry. They operate with the efficiency of a larger concrete contracting company while having a personal touch of a small business.
| WEBSITE: | https://creativeconcreteconstructions.com.au/ |
| ADDRESS: | 127-131 Lincoln Green Dr, Forestdale QLD 4118, Australia |
| CONTACT INFO: | +61 7 3470 5230, [email protected] |
| OPERATING HOURS: | Monday – Friday: 6AM-5PM |
4. WR Concreting

WR Concreting offers personalized service from concept to completion. They also provide appropriate recommendations to their clients aside from their quality service.
| WEBSITE: | https://wrconcreting.com/ |
| ADDRESS: | Bracken Ridge, QLD, Australia, Queensland |
| CONTACT INFO: | +61 418 856 319, [email protected] |
| OPERATING HOURS: | Monday – Friday: 7AM-4PM |
5. MPA Concrete Solutions

MPA Concrete Solutions takes pride in offering practical concreting solutions while upholding high standards of quality. They guarantee that your concrete will survive the test of time. Thanks to their expertise and 20 years of experience in the industry.
| WEBSITE: | http://concreters-brisbane.com.au/ |
| ADDRESS: | 5 Mac St, Bridgeman Downs QLD 4035, Australia |
| CONTACT INFO: | [email protected] |
| OPERATING HOURS: | Monday – Friday: 9AM-5PM, Saturday: 10AM-4PM |
______________________________________________________________________
The cost of building a concrete driveway depends on a number of factors. You can use the guide discussed above to estimate the cost when you are planning to build one on your Brisbane property.

